Softaculous is used by SiteGround as a quick and easy way to install Joomla and other web applications. It's a third party piece of software that runs on cPanel.
Using a one-click installer like Softaculous greatly reduces the time it takes to set up a website. The only downside to using simple installers is that you cannot create your own database username and password. These values are randomly generated.
If you are wanting to make your own database and user you will learn how in our manual SiteGround Joomla install guide.
If you are new to Joomla the softaculous 1 click installer is a great way to start.
Before you begin, you will need:
- A SiteGround account (Sign up)
- SiteGround Username / Password
- DNS configured (Domain name pointed to SiteGround Server)
Step 1: Login to cPanel
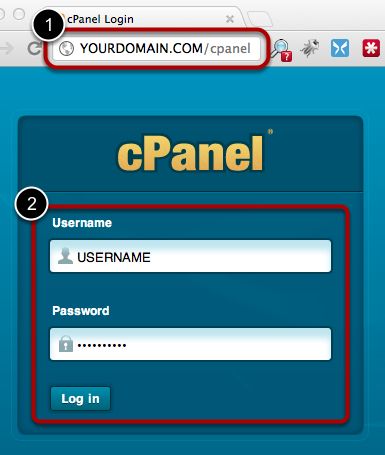
- Go to http://YOURDOMAIN.com/cpanel
- Enter the SiteGround username and password you created when you signed up for an account. Click "Log in".
Step 2: Open Softaculous
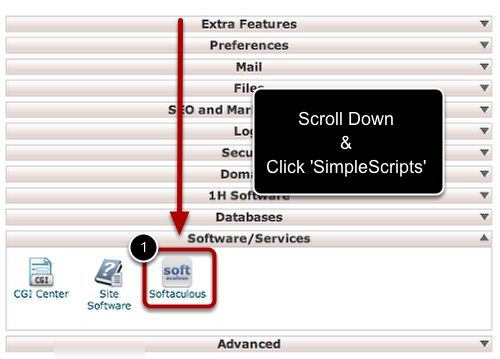
- Scroll Down and click 'Softaculous' in the 'Software/Services' section.
Step 3: Select Joomla
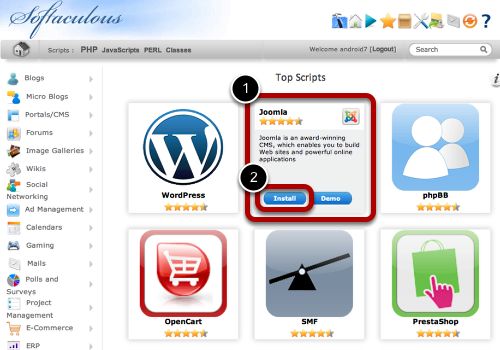
- Select Joomla which is listed in the 'Top Scripts'. If for some reason it is not listed in the 'Top Scripts' area you can also find it in 'Portals/CMS'. Note - You have to hover the mouse over the Joomla icon for it to reveal the 'Install' button.
- Click Install
Step 4: Enter Joomla Site Information First Section
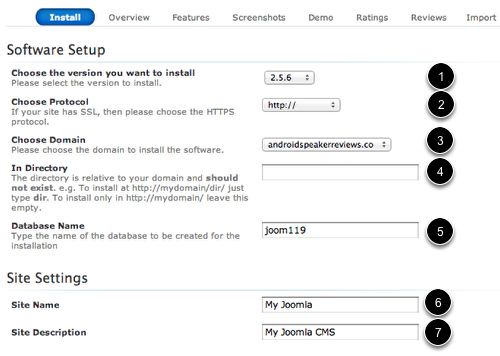
- Choose the latest version of Joomla from the dropdown
- Choose protocol (usually 'http', 'https' is a security layer)
- Choose the domain you want to install to
- Leave 'In Directory' blank unless you want to install Joomla to a sub section of your site
- Choose a database name or leave the auto-generated name
- Type in the human readable site name
- Type in the site's description
Step 5: Enter Joomla Site Information Second Section
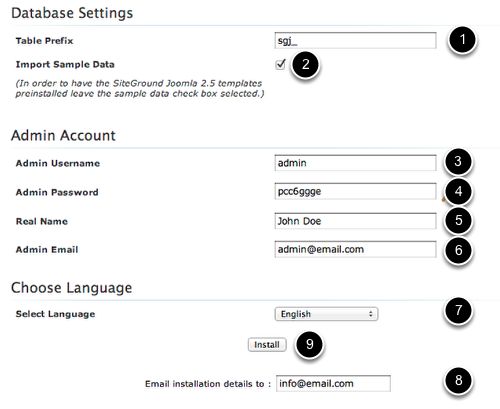
- Only change the 'Table Prefix' if you know what it means. If you are unsure what it does, it will be fine the way it is.
- Check Sample Data if you want to install sample articles, menus and modules onto your Joomla website. Good for beginners, but advanced users may find these extras annoying.
- Enter Admin Username - This is the username you will use to login to Joomla
- Enter Your Name (or the name you want displayed in Joomla)
- Enter Admin Password - Something hard to guess and secure will help you keep your site safe from attacks
- Admin Email - The email that is attached with the Admin account. This is where your username and password will be delivered should you forget them
- Select Language that you will use in Joomla
- Enter An Email for Joomla to send you all of your newly created Joomla account information (Recommended)
Step 6: Joomla Install Confirmation
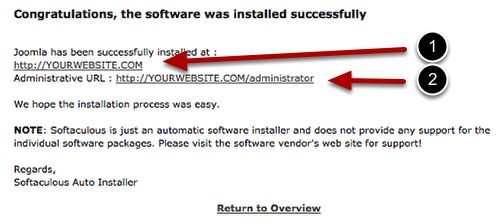
- This is the link to your new Joomla Site
- This is the link to where you login into your new Joomla Administrator Control Panel
Note - You will get an email that you can save with your login details.
Step 7: Visit Your New Joomla Website
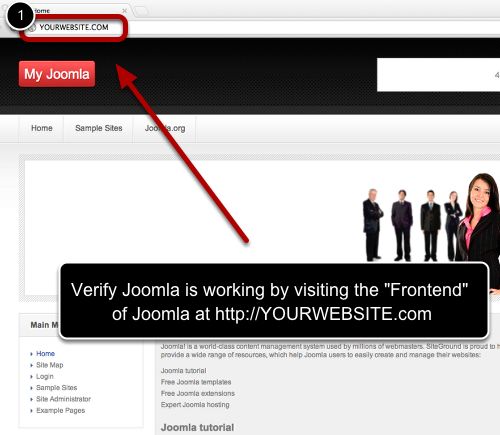
- Verify the installation works. You can do this simply by visiting the domain of the website you installed to. Just type in http://YOURWEBSITE.COM and it will show the custom SiteGround template that is built into the installation.
Step 8: Congrats! You're Ready To Use Joomla!

- Log into Joomla administrator interface by going to http//YOURWEBSITE.COM/administrator
- Once you've logged in, you are ready to start writing articles, making menus and customizing Joomla!


